
Fluttergram
A working Instagram clone written in Flutter using Firebase / Firestore
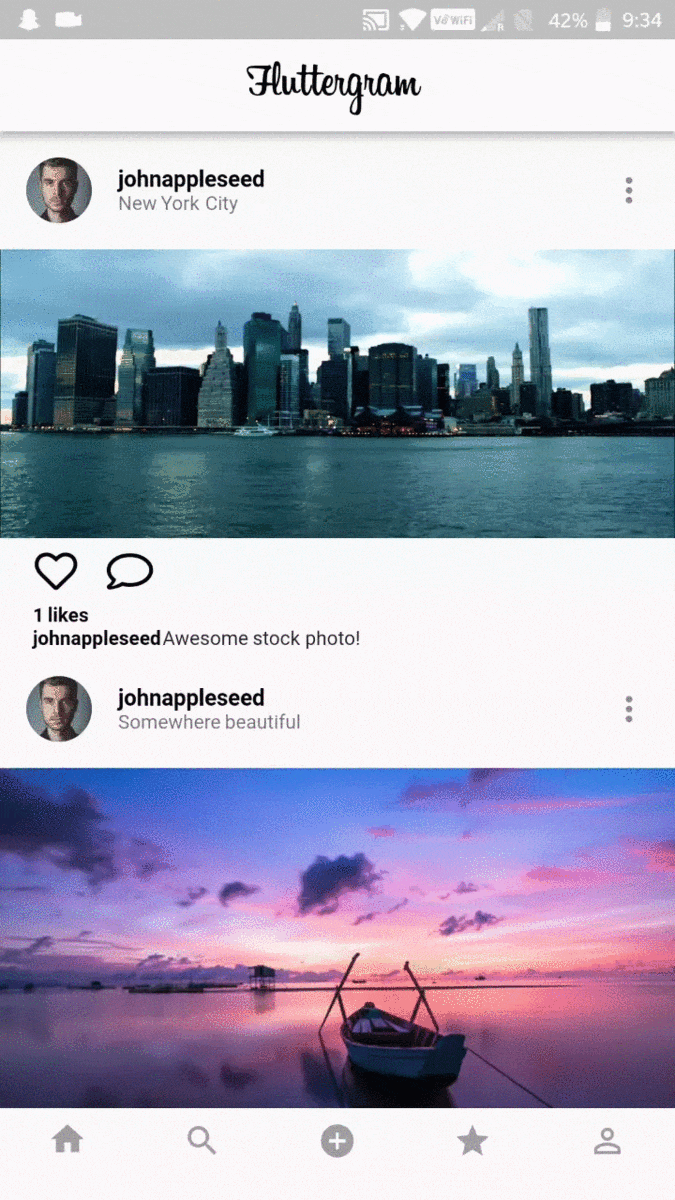
Demo
Download the release APK to try out Fluttergram
Features
- Custom photo feed based on who you follow (using firebase cloud functions)
- Post photo posts from camera or gallery
- Like posts
- Comment on posts
- View all comments on a post
- Search for users
- Profile Pages
- Follow / Unfollow Users
- Change image view from grid layout to feed layout
- Add your own bio
- Activity Feed showing recent likes / comments of your posts + new followers
Screenshots


Getting started
1. Setup Flutter
2. Clone the repo
$ git clone https://github.com/mdanics/fluttergram.git
$ cd fluttergram/
3. Setup the firebase app
- You’ll need to create a Firebase instance. Follow the instructions at https://console.firebase.google.com.
- Once your Firebase instance is created, you’ll need to enable anonymous authentication.
- Go to the Firebase Console for your new instance.
- Click “Authentication” in the left-hand menu
- Click the “sign-in method” tab
- Click “Google” and enable it
- Create Cloud Functions (to make the Feed work)
- Create a new firebase project with firebase init
- Copy this project’s functions/lib/index.js to your firebase project’s functions/index.js
- Push the function getFeed with firebase deploy –only functions In the output, you’ll see the getFeed URL, copy that.
- Replace the url in the _getFeed function in feed.dart with your cloud function url from the previous step.
If this does not work and you get the error Error: Error parsing triggers: Cannot find module ‘./notificationHandler’ Try following these steps. If you are still unable to get it to work please open a new issue.
- Enable the Firebase Database
- Go to the Firebase Console
- Click “Database” in the left-hand menu
- Click the Cloudstore “Create Database” button
- Select “Start in test mode” and “Enable”
- (skip if not running on Android)
- Create an app within your Firebase instance for Android, with package name com.yourcompany.news
- Run the following command to get your SHA-1 key:
keytool -exportcert -list -v \
-alias androiddebugkey -keystore ~/.android/debug.keystore
- In the Firebase console, in the settings of your Android app, add your SHA-1 key by clicking “Add Fingerprint”.
- Follow instructions to download google-services.json
- place google-services.json into /android/app/.
- (skip if not running on iOS)
- Create an app within your Firebase instance for iOS, with your app package name
- Follow instructions to download GoogleService-Info.plist
- Open XCode, right click the Runner folder, select the “Add Files to ‘Runner'” menu, and select the GoogleService-Info.plist file to add it to /ios/Runner in XCode
- Open /ios/Runner/Info.plist in a text editor. Locate the CFBundleURLSchemes key. The second item in the array value of this key is specific to the Firebase instance. Replace it with the value for REVERSED_CLIENT_ID from GoogleService-Info.plist
Double check install instructions for both
- Google Auth Plugin
- Firestore Plugin
What’s Next?
- Notificaitons for likes, comments, follows, etc
- Improve Caching of Profiles, Images, Etc.
- Better post creation, add filters to your image
- Custom Camera Implementation
- Animations (heart when liking image)
- Firebase Security Rules
- Delete Posts
- Registration without Google SignIn
- Direct Messaging
- Stories
- Clean up code
Credit (github url) : https://github.com/mdanics/fluttergram
Next Article : https://flutterappdev.com/2019/01/30/a-digital-bookshelf-for-your-reading-progress-mobile-app-development/


